Setup guide

How SalesToAccounts works

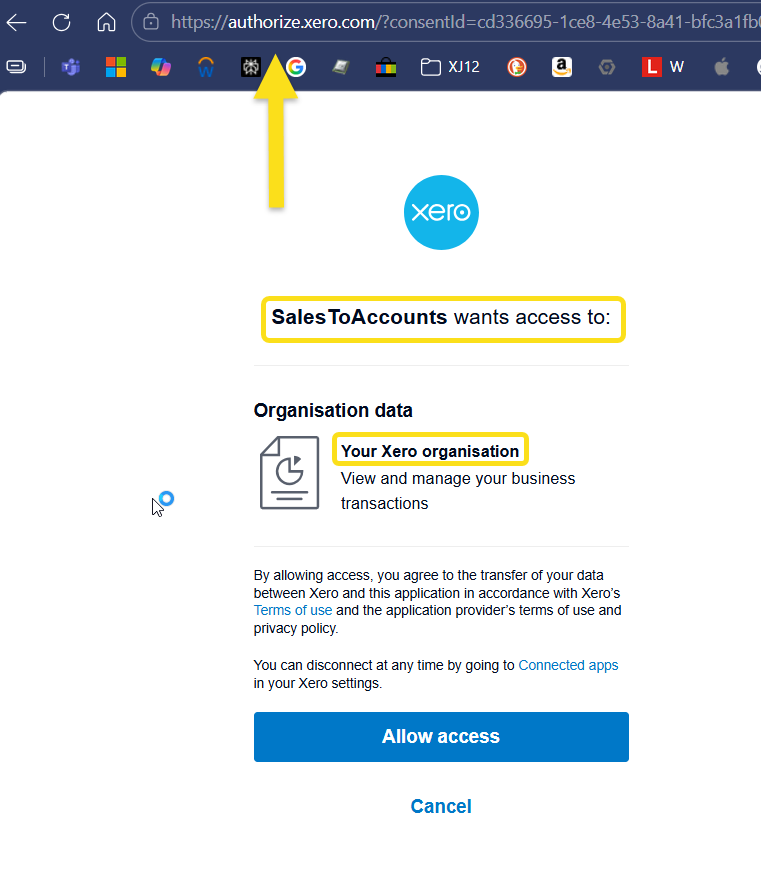
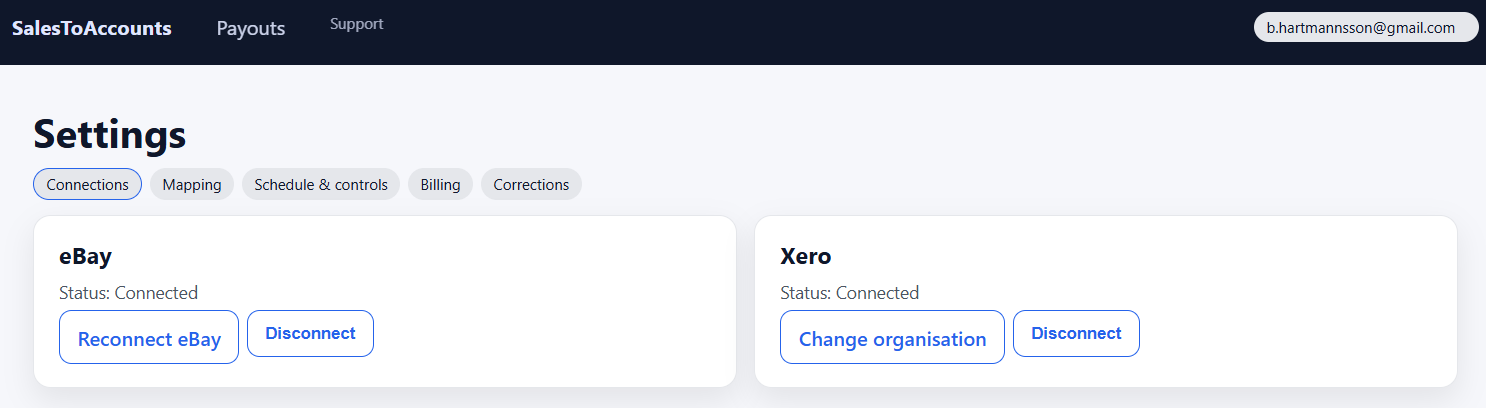
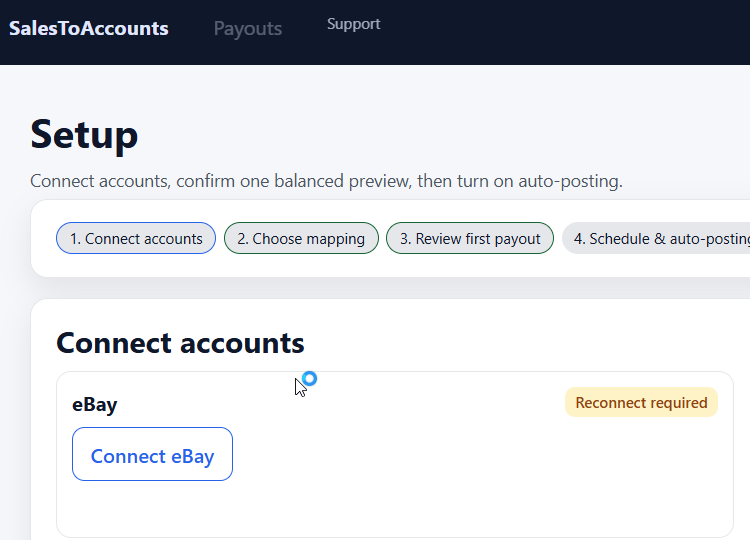
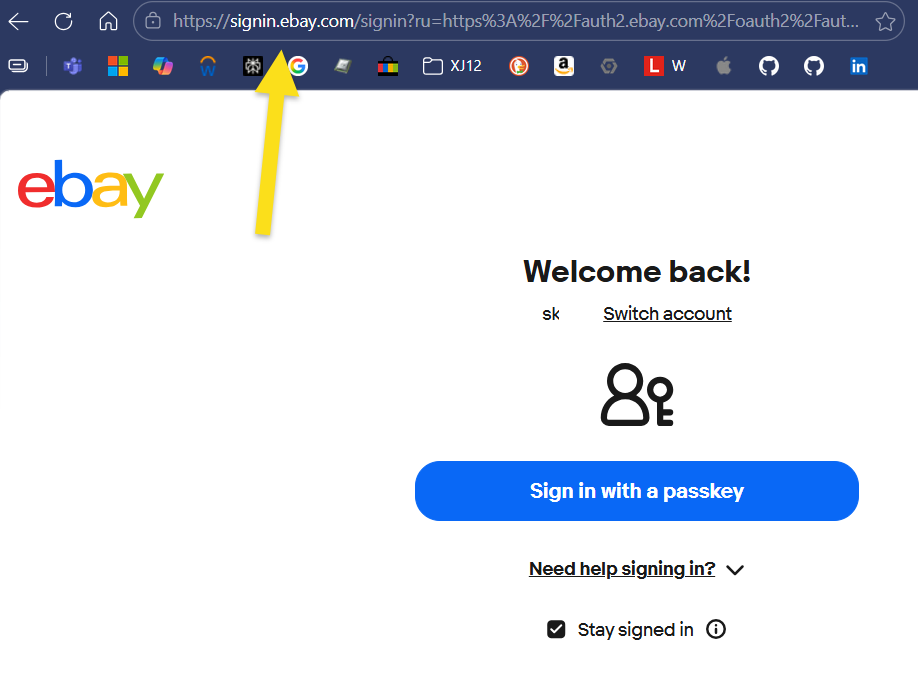
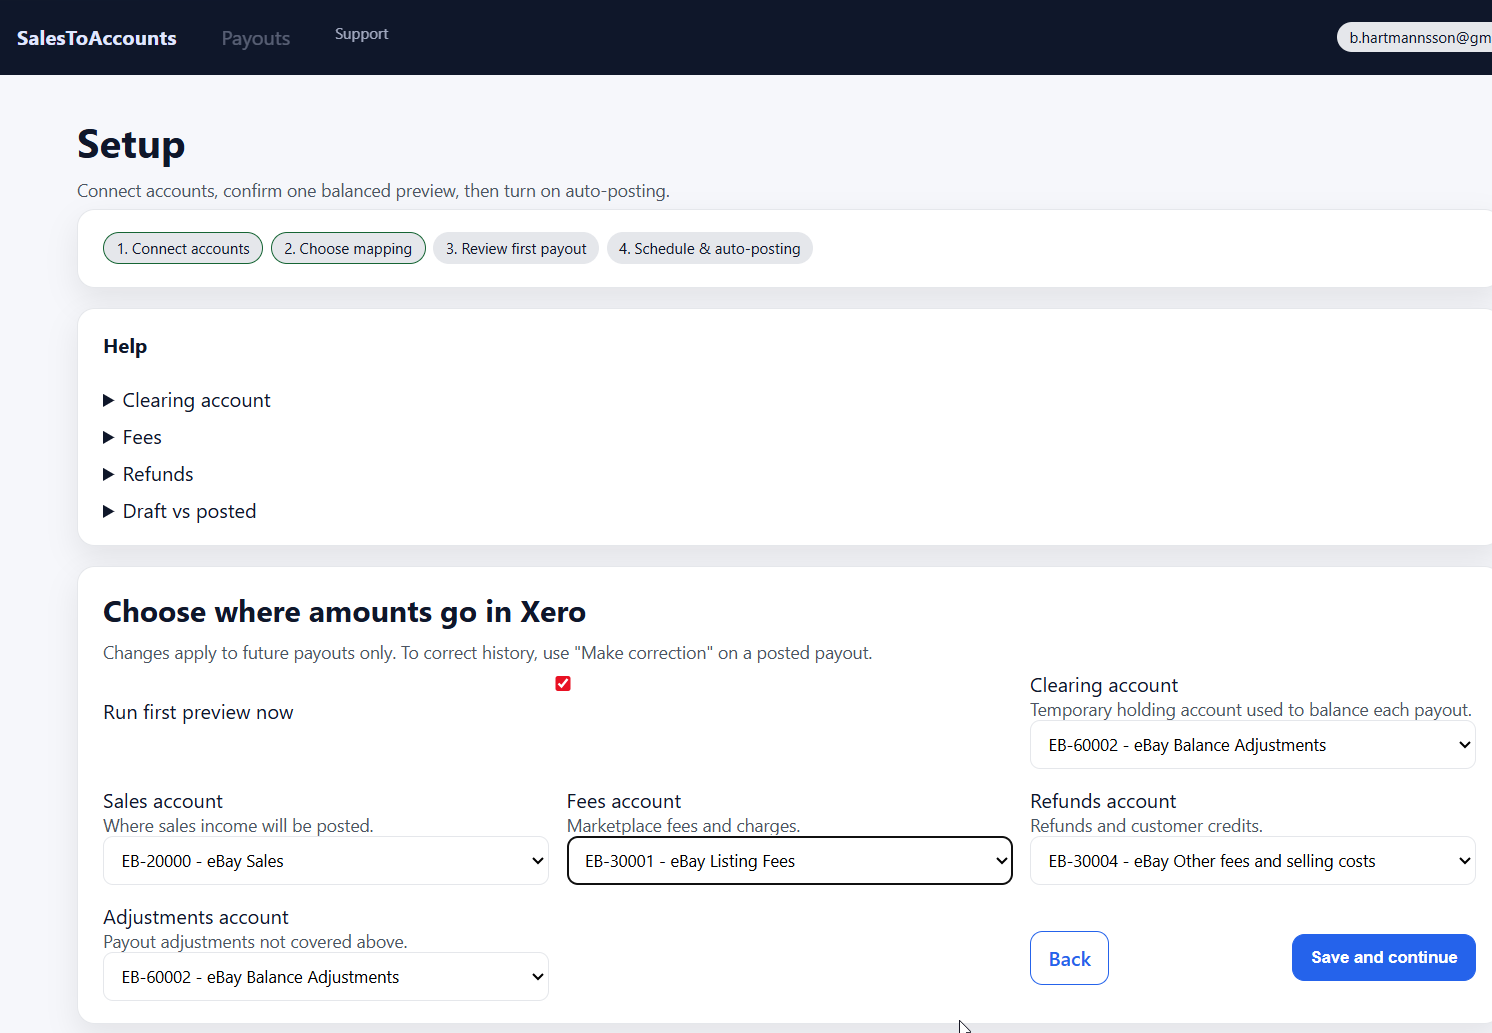
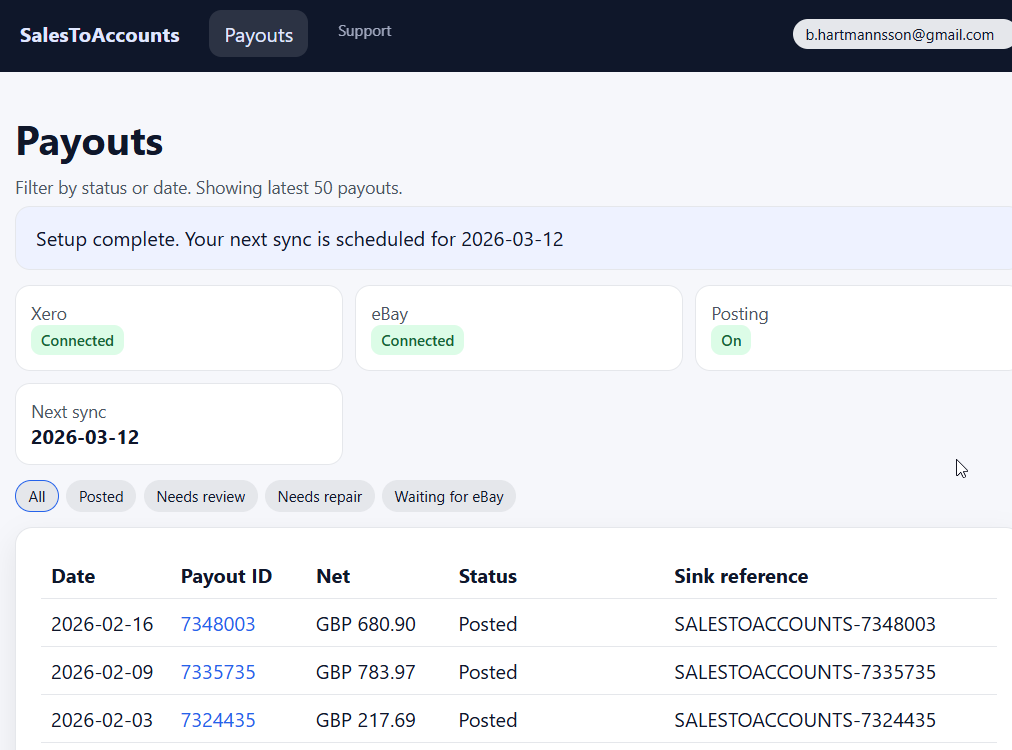
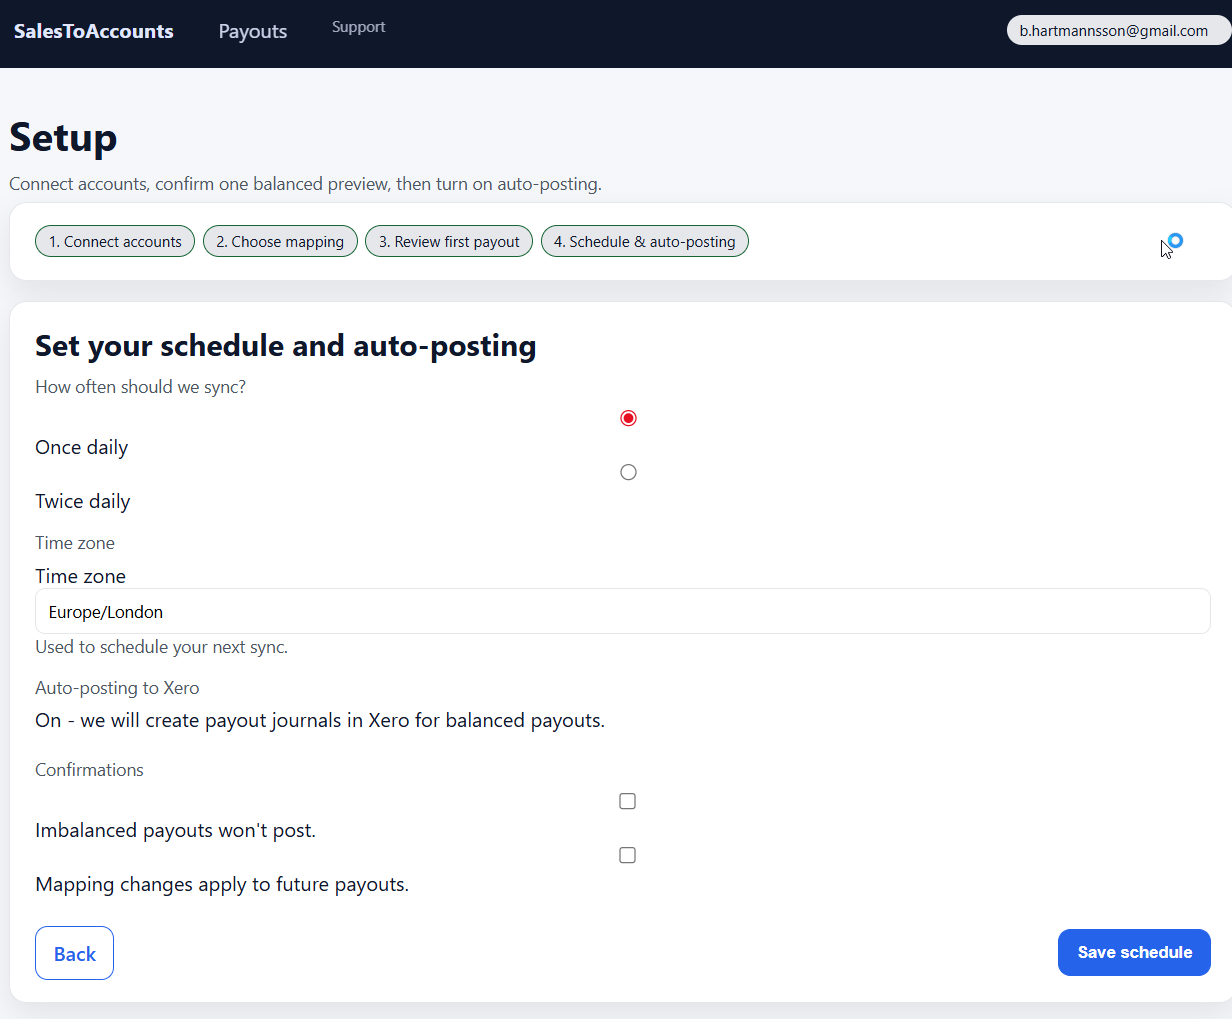
First connect Xero, then connect eBay, choose where each payout part should land in Xero, review one real payout, and only then turn on scheduled posting.

SalesToAccounts is built for UK eBay sole traders using eBay Managed Payments and Xero on a non-VAT, cash-basis, single-entity, GBP-only setup

The setup is deliberately simple: get the connections in place, check one real payout, then decide whether you are comfortable relying on it for future payouts.

If that is not your setup, stop here and use the fit page instead: Not for VAT, accrual-led, stock, inventory, or cost-of-goods workflows; limited companies; multiple entities or Xero organisations; non-GBP setups; other marketplaces or ledgers; HMRC filing; or real-time sync expectations.

Step 1

Connect your Xero organisation

Connect the one Xero organisation you want SalesToAccounts to post into.

This gives the setup somewhere to send the entry. Without it, there is nowhere for the payout entry to go.

What to check: you are connecting the correct GBP Xero organisation for the business you actually want in scope.

Step 2

Connect your eBay account

Connect the eBay account that is receiving Managed Payments payouts.

This is where the payout data comes from. SalesToAccounts reads it from eBay and gets the Xero entry ready from there.

What to check: it is the same seller account you want to review and later post from.

Step 3

Choose where each payout part lands in Xero

Choose the Xero accounts for sales, fees, refunds, adjustments, and the net payout balance line.

These choices control how future payout entries are created. This is the setup step that matters most before review.

What to check: each category is going to the account you would actually expect to see in Xero later.

Sales
Revenue lines created from the payout.
Fees
eBay charges and related cost lines.
Refunds
Refund-related lines kept separate from sales.
Adjustments
Other payout adjustments that need explicit routing.
Clearing
The balance-handling account used for the net payout.

Step 4

Review one real payout before relying on it

Before scheduled posting is turned on, review one real payout so you can see whether the output makes sense for your books.

This is the main confidence step. You are not trying to prove every possible edge case. You are checking that one real payout makes sense before you rely on future scheduled posting.

What to review first

  • The payout reference and net payout amount match what eBay shows.
  • Sales, fees, refunds, and adjustments are split into lines you can follow.
  • Each line is going to the Xero account you expect.
  • The result balances before scheduled posting is switched on.

A good first review means you can explain the payout from its component lines and see how it will make sense later in Xero and reconciliation.

See the full payout walkthrough

Need the reconciliation view? See the reconciliation proof.

Step 5

Turn on scheduled posting

Once the first payout review looks right, choose the schedule and enable posting for future balanced payouts.

  • only balanced payouts are posted
  • mapping changes affect future payouts, not old ones
  • posting runs on a schedule rather than in real time

This is where the setup becomes routine. The review step comes first so you are not switching on automation blindly.

Billing

During the current beta, accepted users use the product free. Standard billing is the post-beta commercial path and is covered on the pricing page.

Background

Need the accounting background first?

If you still need the bookkeeping background behind the workflow, use the owner guides below instead of trying to infer it from the setup steps alone. If the “why now” question is really about MTD pressure and record-keeping, use the MTD explainer as well.

Next step

Ready to check fit?

Use the beta review page to confirm the current supported setup, apply for review, and see what happens before onboarding starts.